Installing Exterior Insulated Finishing System (EIFS)
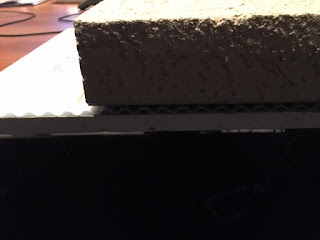

Recently I had the opportunity to attend an EIFS installers class. Anytime I get the opportunity to attend an installers class presented by the manufacture I take it. I have taken several and you would be surprised how many items or systems are installed incorrectly. Even though they may appear to be installed correctly, the manufacturer may void the warranty or it will not operate as efficiently as desired. In the case of EIFS, we all know the issues that in the past has given it a bad name. However, it is a great product and the issues associated with it are all related to poor or improper installation. Outsulation or EIFS is manufactured in 2’ x 4’ panels, in thicknesses of ¾” to 4”. It is not approved for interior applications. It also increases R factor. If installed correctly eliminates thermal breaks. EIFS helps maintain a constant interior temperature. You can find more technical information here: http://www.dryvit.com/tools-resources/technical-literature/. There is also a very nice guide you can give clients that have EIFS installed.
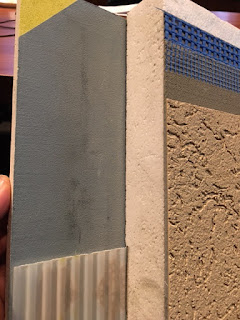
So let’s take a look at how outsulation or EIFS should be installed and what a home inspector should see in the field:
- The best substrate for EIFS is; cement board, fiberglass coated gypsum (EXP), concrete, block, exterior grade plywood, or Moisture 1 OSB
- If is not recommended to be installed over Masonite, pressure treated plywood, or fiberboard
- It is recommended that the panels are glued, however it can be fastened using approved fasteners
- Expansion joints should be present
- Cannot be used in areas with a 6 in 12 pitch, roofing materials must be used for this
- Must terminate 8” above grade
- The foam should be installed in a “picture frame” configuration around windows and doors
- To facilitate moisture drainage, a notched trowel 3/8” x 1/2’ x 1 1/2’ should be used with vertical lines and a drainage strip at the bottom.
- Proper flashing should be installed in all areas either by rubberized tape or liquid application
- Any discoloration, flaking or damage should be noted on your report
- Check interior areas around doors, windows, and transitions
Related Articles:
- EIFS – Additional Inspection Guidelines
- Proper Air Sealing & Moisture Control
- Inspecting Fiber Cement Siding
- Deck & Porch Flashing
Want To Learn More? Click HERE to Search Our Full Database Of Home Inspector Newsletters.